Thursday, November 8, 2012

Ascend Remake


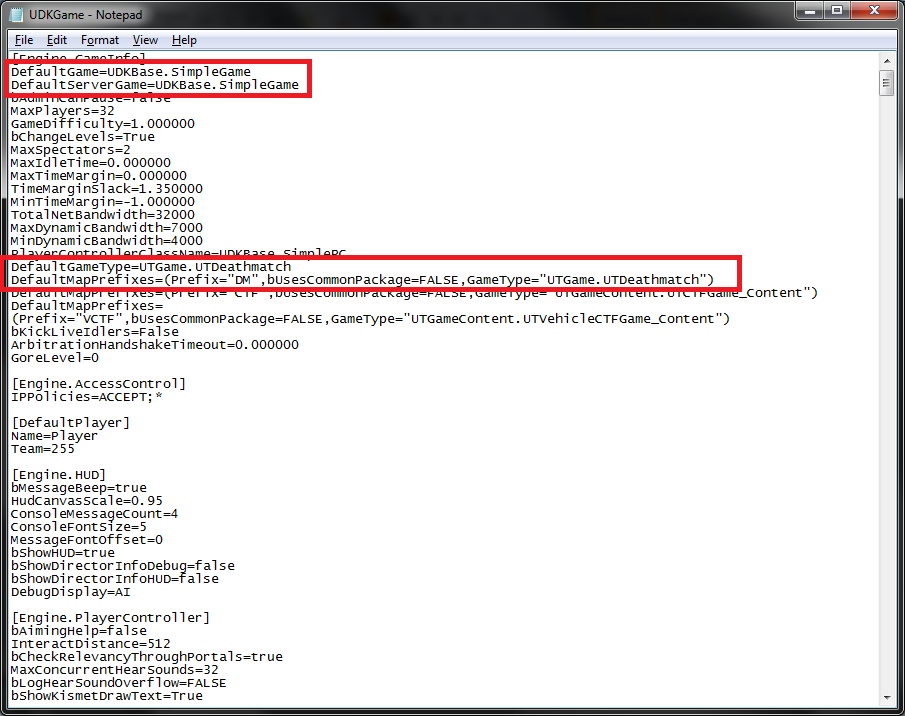
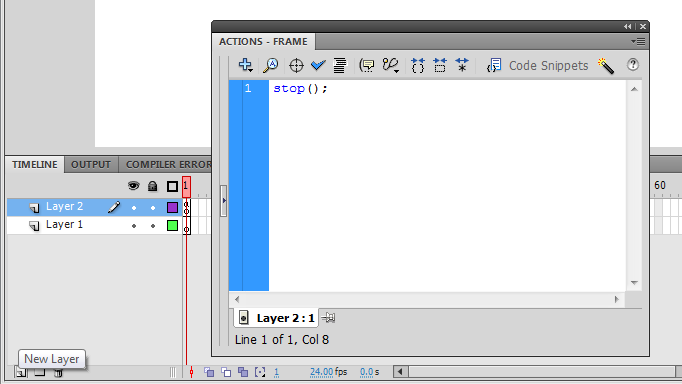
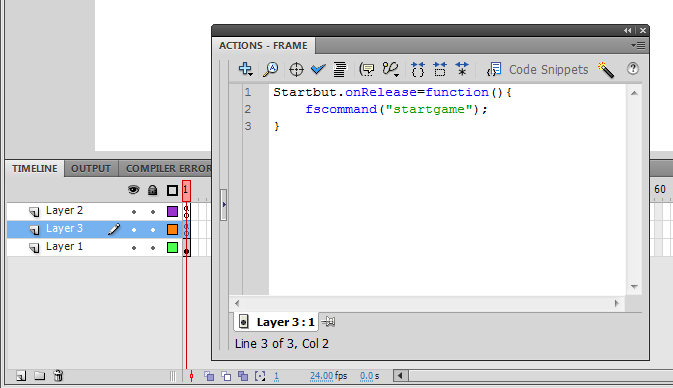
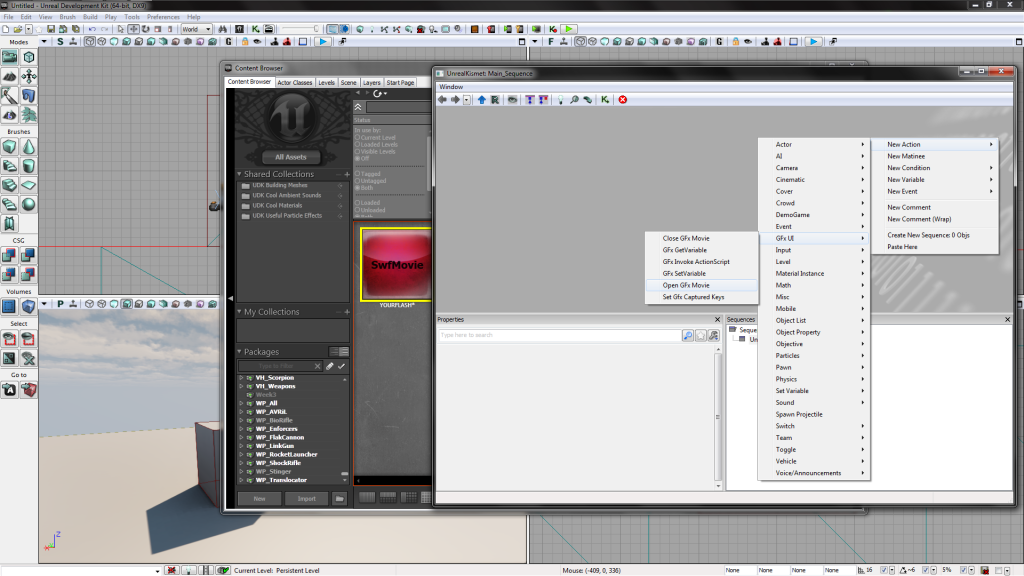
I have decided to continue working on the project Ascend on my own. I am still continuing to work on The Adventures of Uno to make it better for competitions that we will be entering it in, but the Ascend project is completely on my own with no real benefit other than making the game better so that people can play it.

The changes that I am going to make will be a complete over hall from what I currently have. I will be using some of the assets but around 90-95% of the content will be new and tailored to the game. Some of the members that worked with me on this project are interested in working with me to make it better, but they haven't contacted me in a while so I am assuming that there not really interested or have other things to do.

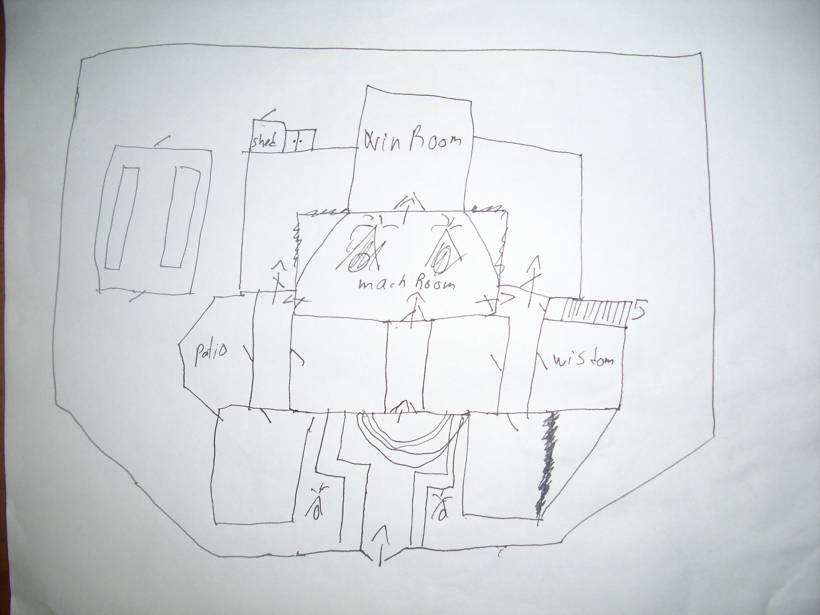
One of the major over halls would be that the mansion it self is going to be redone completely that's something that I noticed when playing the game. It will still contain some of the core elements such as slow walking you only have a candle and when it does out you lose the game. I feel that putting a timer on the game would be good, and so that the use will continue to move forward instead of staying in one spot for to long. I am going to change some of the puzzles but still keeping the concepts in there. The mansion will be more interact able such as notes on the wall to give clues on what to do and expect. In our current build you just get thrown in a house and expect to know what to do or hope that you read the explanation on the main menu page. I will try to have a reason for you to be in the mansion and a better main menu.

Some things that I will keep in the game are the sounds and some of the textures that really looked good with what we have and what I'm going to make the game into. Like I said above there will be tons of new things that I will have to create for the purpose of this game.


This is a rough sketch of the mansion layout that I am making.

Wednesday, October 24, 2012

Week 16 of Midterm

This is the final week of the Midterm class. So with this I have completed two of the hardest classes to take in this program, and I did them at the same time. We do have some small bugs or problems with the game and we will be fixing them in the real near future. In my previous post I said that I'm going to be posting  shortcut links on the side of my blog, because I got a lot of positive feed back on some of the posts I did previously. With that in mind it got harder to find those really helpful tutorial posts that I did so I added a some shortcut links on the left side of my blog to navigate to them. I will also be posting my most up to date download of the game I created just like this one. I do have some fixes to add and that is where the shortcut links come in handy.

GSP 340 Week 8

The class is completely over. However I will fix some bugs that we had during presentation and some visual tweaks that I noticed that we didn't get to on time. I will be getting to these fixes and posting them on this blog when I'm able to get around to it. It might be tomorrow, next week or next month. The download will be about the same size around 250MB. To have the link more accessible I'm thinking about adding a list of shortcut links on the left hand side of this blog. It will be something to play with and get feed back.

Monday, October 22, 2012

Week 15 of Midterm

This being the final week of this class all we had to make sure was that our game runs for the presentation that is on Wednesday (10/24/2012) . We were also assigned to create a website, game trailer, and a formal power point presentation. These are the links to our website, download page, and trailer.


Adventures of Uno Trailer

GSP 340 Week 7


This is the final week of this class. Throught the entire class I have had to do two projects one is my very own homework assignment and the other is a group project. In my group I am in charge of HUD UI, main menu, in-game annoucements, and packaging. I also had to take up the role of the leader. Both have to be completely diffrent and we can't use anything in our homework for our group project. There are a total of four groups in our class. This Thursday (10/18/2012) was debug and beta testing, out of all the other groups ours was the only one that had something to show. I push my team members really hard but in the end it pays off. We are all done with the assignemnts that we agreed on with some days to spare. The game can still use some polishing and tuneing, but I will need some play testers that are not me or any of my group members. I will try to post a short video of our game and also a download link to the .exe


Wisdom Room

Courage Room

Tactics Room

Final Room

Monday, October 15, 2012

Week 14 of Midterm

This week I was placed in charge of making sure that everything inside of the subtraction level behaved properly and I also had to make the level presentable. By presentable I mean that I had to add things such as trees, ground clutter, grass, etc... At first it was hard I just found myself asking "Alright, what should I put here." but as soon as I remembered that this level had to be cartoony and also childishly spooky. So for the cartoony I just had to remember that this game is meant for kids in elementary school.

So I asked one of my friends little brother what kind of cartoons and games does he play. He said that he really likes Call of Duty, Madden and Street Fighter. I have played all of these games and know there play and art style. Call of Duty is a first person shooter, It's main goal is to create a realistic shooting game that's why you play the game through the players eyes and not over the shoulder like some other games. I knew that Call of Duty wasn't the right choice to base my Cartoony Cemetery on.

Here are some screen shots of how Call of Duty looks and plays.


So I moved on to the next game he mentioned Madden. Madden has been around for a long time it was around since the 1990 and still is very popular. The genre of Madden is just like Call of Duty is to make a realistic game, but instead of using guns you use a foot ball. If you didn't know Madden is a American Football game. Being a sports game trying to carry any of the art style would be pointless because our game has very little real life props.

These photos are from in-game footage of Madden 13, The announcers look just like the would on TV.


Next I moved to Street Fighter. Street Fighter is just as the title suggests it is a fighting game where you and a opponent have health and fight with punches, kick, and special moves until someone's health reaches zero. Just like Madden Street Fighter has been around since the 1990's but It's original art style has changed over the years from realistic to cartoony to realistic and now it is currently in the middle of cartoony and realistic. If we wanted to make our game for a more mature audience like High School's we would change our art style to that of Street Fighter, but the target is Elementary School so I will keep this in mind but it's unusable.

These two screen shots are of Super Street Fighter 4: Arcade Edition, one of the most played and polished game of series.


After I knew none of these games were what I was looking for I looked into the cartoons he told me about. Which were "Fairly Odd Parents" and "Adventure Time." Both of these I'm fairly familiar with but I sat down with him and watched one episode of them. One thing I noticed about both were that they used solid colors expect when shading lighting and on special occasions. Fairly Odd Parents worked well as a cartoon with jokes and Adventure Time worked with action and making the watcher get exited about doing something. So once I noticed that from both I went with Adventure Time.

The picture on the left is Adventure Time and the one to the right is Fairly Odd Parents

While doing some research on Adventure Time I came across some episodes that would help me create a spooky cemetery and in general freaky. The thing that I saw that really caught my eye was that there was a slight fog on the floor and a lot of trees with ground clutter. The general freaky has a lot of fire on the floor and the color scheme is more on the red side then anything else.

This helped me decide on what I would do when thinking about my Cemetery level and how to get a game to look freaky while keeping it cartoony

GSP 340 Week 6

We are currently in crunch time for this class. For our group project I was in charge of the HUD and Main Menu. I was able to get both of them working fairly quick, this gave me the rest of the week to work on my homework for the class. The homework was to paste together all of the assignments that we have been working on and convert it to a executable. The one thing that gave me a headache the most was putting everything together and having them work perfectly and getting everything to convert to a executable. In the end everything came out great and I was able to get really comfortable with packaging, so comfortable that I'm going to put together a short tutorial on it.

First you need to make sure that everything works perfectly and you don't get any error's when compiling your scripts. Secondly, you should have your own game type but if you don't that is fine it is just simpler if you do. Lastly, MAKE SURE EVERYTHING WORKS PERFECTLY. I placed this twice because it is one of the most important steps in this tutorial. If you created a working Main Menu Level place that in "NAMEOFMAP.udk" 

Navigate to your Config folder and open "DefaultEngine.ini" Change "MapExt=UDN" and "Map=NAMEOFMAP.udk" also "LocalMap=NAMEOFMAP.udk" Save then Close (My config location is "C:\UDK\UDK-2011-10\UDKGame\")


Next open "DefaultEngineUDK.ini" and "UDKEngine.ini" and change in both "MapExt=UDN", "GameNameShort=UDN",  "Map=NAMEOFMAP.udk", and "LocalMap=NAMEOFMAP.udk". Save and close.


Here is the part that would be easier if you have a custom game type. Open DefaultGameUDK and change the following "DefaultGame=UDKBase.UDKGame", DefaultServerGame=UDKBase.UDKGame", and "DefaultGameType="UDKBase.UDKGame";" Save and close (Instead of "UDKBase.UDKGame" you would put your game type if you did a custom game type it would look something like "DeafultGame=MyMod.CUSTOMGAMETYPE" but if your game type is something like UTDeathmatch it would look like "DefaultGame=UTGame.UTDeathmatch" you would just have to do some digging around to find the correct url to the game type)


Open "DefaultGame.ini" change the following to "DefaultGame=UDKBase.UDKGame", "DefaultServerGame=UDKBase.UDKGame", and "DefaultGameType="UDKBase.UDKGame";" Now you need to add a line of code right after DefaultGameType it should look like "+DefaultMapPrefixes=(Prefix="TEST",bUsesCommonPackage=FALSE,GameType="UDKBase.UDKGame")" Just like in the previous step you can change UDKBase.UDKGame to whatever your game type is but this time you need to make sure your actual level and not your main menu has the prefix "TEST" it should look something like this "TEST-somename.udk". Save and close the file


Next open to make sure your "UDKGame.ini" You need to check if "DefaultGame=UDKBase.UDKGame" is there also "DefaultServerGame=UDKBase.UDKGame", "DefaultGameType="UDKBase.UDKGame";" and that there is a "DefaultMapPrefixes=(Prefix="TEST",bUsesCommonPackage=FALSE,GameType="UDKBase.UDKGame")" Save and close this file.


Next open Unreal Frontend Clone the DM-Deck Profile rename it to the title of the game. Next add all your maps and remove the previous map by using the Add and Remove buttons.


Now make your beginning map active first. This can be some by checking the box labeled "Override Default" and then select your .udk from the drop down menu. Now in the Cooker Options type "-recookseekfree -full"


Next select the drop down arrow in Start and click "Start: Full rebuild and recook" Once it completely builds  and there is no errors it will start your game. Close your game and select Package Game.


This will bring you to the final step which is saving your game as a .exe. Change the names in these fields to your game title and click "Package Game" and your done. (The location of the actual .exe file is in your "C:\UDK\UDK-2011-10\" directory to install the game you don't need UDK just administrator rights because you are installing a Game)

Tuesday, October 9, 2012

Week 13 of Midterm

This week of Midterm I had to map out the controls for the Xbox 360. We were going to do for both Xbox and PlayStation but for the presentation were are just going to have a Xbox 360 controller instead of the key board. We also are going to have someone in the audience play our game for us instead of us playing it we think it would be really cool if someone plays it instead of us. So that's why we had to get the controls working. The controls are both very similar from Xbox to PlayStation the only difference being is that the D-pad is swapped with a analog stick. Something really cool that I learned about Xbox 360 controller compatibility is that it's so compatible with everything that even the military uses it to control there bomb defuse robots.


As you can see the Military does use Xbox 360 controllers to maneuver there Robots instead of a old computer joystick


Now I will talk about the reasons we choose our buttons over other buttons. Lets start with our movement and camera. We play a lot of game some old titles and some new one's also and what we came up with is that for a adventure game or any modern game your left thumb is usually the thumb you use to move with and your right is the one you use to look around. It has been like this since they came out with the PlayStation 2. It was made available for the first PlayStation but it wasn't there original controller. In the second generation the PlayStation 2 the console came with the same design with the addition of the two analog sticks on the bottom, at first the first couple of titles didn't require you to use the analogs it was not until later that the analog became a standard and most game even until this day give tutorials on how to use your thumbs to move and look around. So that is why we choose to use them as our movement and camera. The jump button dates back to the Nintendo Entertainment System (NES) where there was only two buttons in the controller it was usually jump and action.I am fairly certain everyone knows who Mario is the first game be came out in just had him jumping, walking, and climbing ladders and later in the classic platform game Super Mario Bros your jump button was located at the bottom of the controller so we decided to make our game like a classic platform and have the jump button at the bottom of the key's. Our attack button is not a conventional attack trigger it is more of the Super Nintendo platform years. There "Action" button was on the left button (Action button is the same thing as attack) Currently we have a special button that is located at the top, but in game it has no use as of right now, we choose this because it just felt right. We were holding the controller and decided that the special button should be in a place that your finger wont identically hit it so we went with what felt well and comfortable. Our "use" button is on the right side this originally was our "Dash" button but after we finalized the controls we saw that there was no "use" button and we had to change "Dash" to "use." This button was another example of us holding the controller and seeing what felt right no complicated history it just felt right. Our block button is another example of it feeling right. We also wanted to make the player has a sense of "Ok, my shield is on my left hand so I need to use my left hand to use it. " Next we wanted the player to be able to scroll through his inventory to choose different weapons or equipment that he gets and we wanted the player to be able to go left and right of his inventory, because there is nothing worse then cycling though your inventory and identically skipping the item you want and not being able to go back. These buttons are our Left bumper and Right bumper usually your index finger is placed over them while holding a controller. Our right trigger was intended for a roll that we wanted to implemented but it fell on our maybe pile because we noticed that it wouldn't have a big impact on the game. Finally our start button is our pause button. This is just a norm for ALL video games, any game that doesn't follow this just feels strange and you would agree if you just play two or three games.


As you can see there are a lot of similarities in both the Xbox and Playstation controller scheme. This is also why someone that plays Strictly Playstation can swap consols and need very little time to get use to the new control scheme


GSP 340 Week 5

This week I had to do a couple of things that are interesting and some that I'm not sure how I got through. I had to create a Scaleform Main-menu. I have had a lot of experience in Adobe Flash and Actionscript 2.0 it is one of my most favorite programs to use when creating side projects. I also had to replace all the sound files in UDK with my own. Those two things were simple the really hard part and I'm sure I won't be able to replicate because I have tried was creating a custom game type that plays as a default. I had it working once but I tried it again for a project I was working on and it wasn't working. I must have missed something but I did it about four times and still something was wrong.

I am going to explain and walk though how to create a Flash Menu and simple UI. I will try to keep this short so I will make some assumptions that you know how to do some simple things.


Start a new Actionscript 2.0 file. Make your stage size "1280x720" Create a new layer hit F9 and type "stop();"


Select the first layer and make a box using the rectangle tool. Once you done that hit "V" in your keyboard to bring up "Selection Tool" or select the BLACK arrow. Once that is done select the entire box like you would a group of files on your desktop then hit F8. Name it something unique I named mine "SButton" Your going to make sure it is a "MovieClip" the registration won't matter for what were going to be using it for.


Now once that is done you need to name is something so that Actionscript can tell the difference from this and other things that are in the frame mine is "StartBut". Now you can either create a new layer for just your code or have it in this same frame (I am going to make a new one.) Hit F9 to bring up Actionscript and your going to want to put for your START BUTTON


Startbut.onRelease=function(){

fscommand("startgame");


The final step is to create a cursors. In the layer you have your box, create something that you want to use as your mouse pointer I used the Brush tool and made a "<" tiled upward like a mouse pointer. Now hit F8 do the same things as the box WITH the exception of the registration. This time you want it to be on the top left like a mouse would be. Name your cursor something mine is "MCur" Go to your Actionscript where you have the code of the previous step and type in a new line


onEnterFrame=function(){

MCur._x=_x+_xmouse;

MCur._y=_y+_ymouse;


As of right now this flash file will work as a very simple main menu, but you are going to run into some problems when testing this out in UDK. First your background is invisible you can fix this by adding a box in a NEW layer and placing that layer underneath all your other layers so that it is the "background." The other problem that you might and most likely face is that when you hit play AFTER you do the Kismet your game will place with some default game type and this is the part where I don't know how I got it to work the first time but not the other four times. Right now I am going to jump into UDK after I imported this flash file to it. (If you don't know how to do that please read the previous entry in this blog.)

After you have your Flash File imported to UDK create a new level. A very super simple hollowed out box will be fine just make sure it has a player start and a light. (These are the assumption I was talking about earlier) Open Kismet and create a Level Loaded Node by selecting New Event>Level Loaded. Now you are going to want to make your player not move around and also hide any HUD that is visible. Create a Toggle Cinematic Mode by selecting New Action>Toggle>Toggle Cinematic Mode.


You are now going to open the flash file by doing New Action>GFxUI>Open GFx Movie. You are going to want to make sure that "Take Focus", "Capture Input" are checked and that you have your movie applied in the "Movie" section.


If you test it now nothing will happen if you click on the box and you won't be able to get out of UDK only by hitting Ctrl+Alt+Del and ending the UDK Preview window. Now we are going to make the Box start a level. You need to create a "FsCommand" New Event>GFx UI>FsCommand. under Movie you would apply the main menu movie and under it enter the fscommand  we created earlier "startgame"


We are almost complete we just have to open up the level by adding a "Console Command" New Action>Misc>Console Command. Once that is set you need to type "open NAME OF MAP"


When your done rebuild all save your little level. and run is PC Mode and click on your box to open up your actual map. Just as I mentioned above you are going to be thrown into a default game type to fix this you will have to create your own custom game type. For more imformation take a look at the GameType Technical Guide: http://udn.epicgames.com/search/?q=gametype%20technical%20guide

Tuesday, October 2, 2012

Week 12 of Midterm

This week I just had to make sure that the Intro Movie plays when you hit "New Game." I had very little trouble this week doing the only thing that gave me some trouble was importing the flash movie to UDK. There is a specific way to import flash movie's to UDK. However after a couple of imports it just becomes simple.

First you have to make sure that in Adobe Flash you make your movie in Actionscript 2.0. Once your ready to publish it head to the "Publish Settings" then "Flash Player" should be 8 then publish it. (at least in my version in UDK you need it 2011-10)


Secondly you have to place your '.swf" in a specific directory in UDK (Mine is "C:/UDK/UDK-2011-10/UDKGame/Flash/YOURFLASH") Create a folder in the Flash Directory it should be something that you would name your .upk.


Next you would movie your .swf into the folder you created.


Next Open up UDK and in the content browser hit "import" and navigate your folder that you just created.


When you import the .swf you will get a window very similar to this one below. Once you imported it you will be looking at a empty package of it. Here you can move your flash movie to another package but I like to keep mine separate so that I don't have very big .upk's.


That is how you import a flash movie to UDK. once there you can do a kismet event that will open. Rick-click New Action>GFx UI>Open GFx Movie. Then select the node and in the Movie you Activate your Flash Movie by hitting the green arrow while having it selected in your content browser

If you followed everything your flash movie should play, but there are always error that happen, just do it over and do it gently