First you need to make sure that everything works perfectly and you don't get any error's when compiling your scripts. Secondly, you should have your own game type but if you don't that is fine it is just simpler if you do. Lastly, MAKE SURE EVERYTHING WORKS PERFECTLY. I placed this twice because it is one of the most important steps in this tutorial. If you created a working Main Menu Level place that in "NAMEOFMAP.udk"
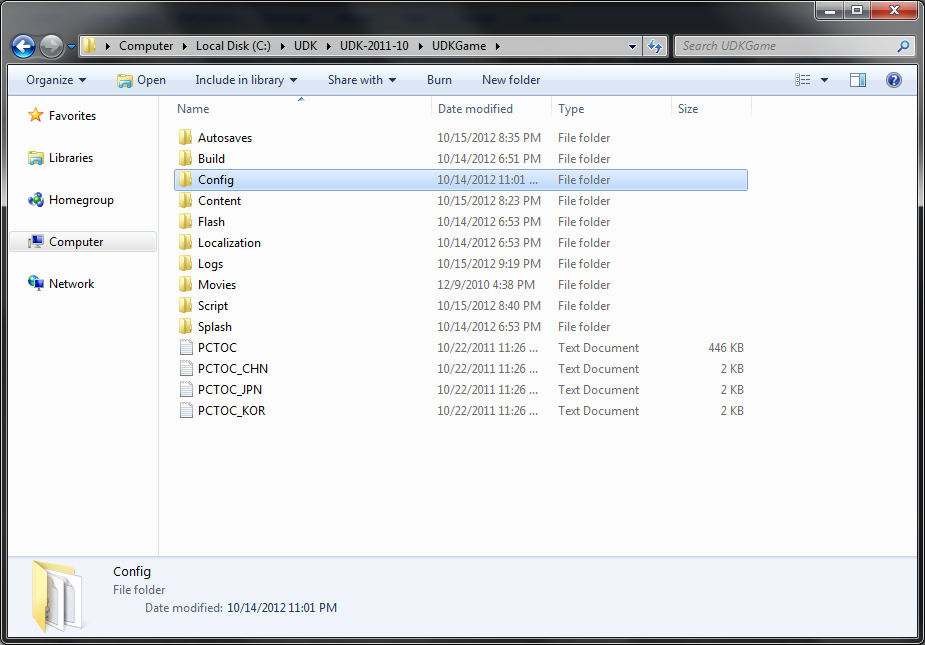
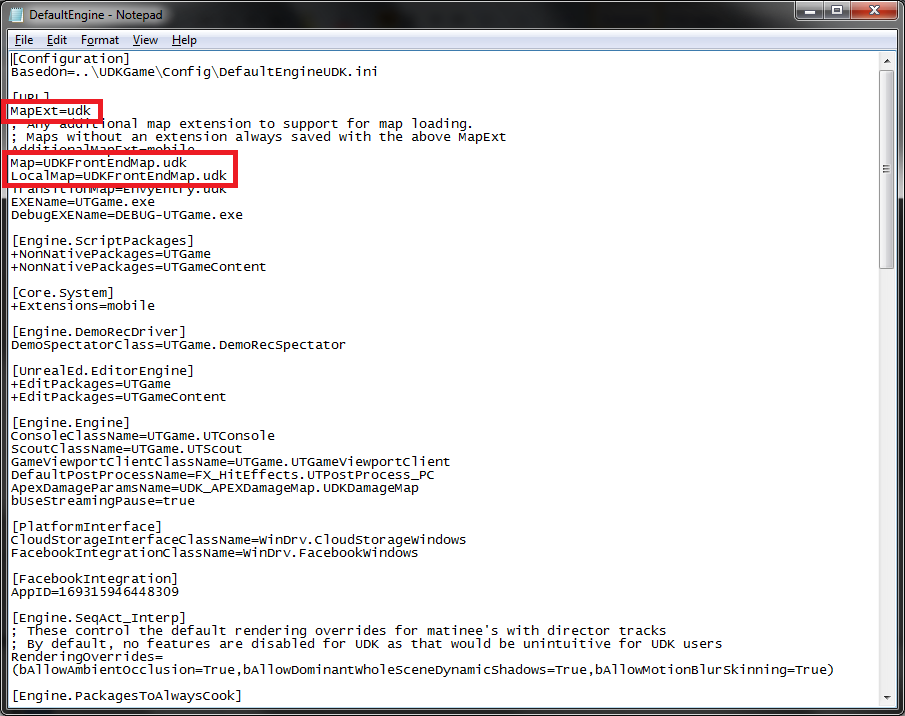
Navigate to your Config folder and open "DefaultEngine.ini" Change "MapExt=UDN" and "Map=NAMEOFMAP.udk" also "LocalMap=NAMEOFMAP.udk" Save then Close (My config location is "C:\UDK\UDK-2011-10\UDKGame\")
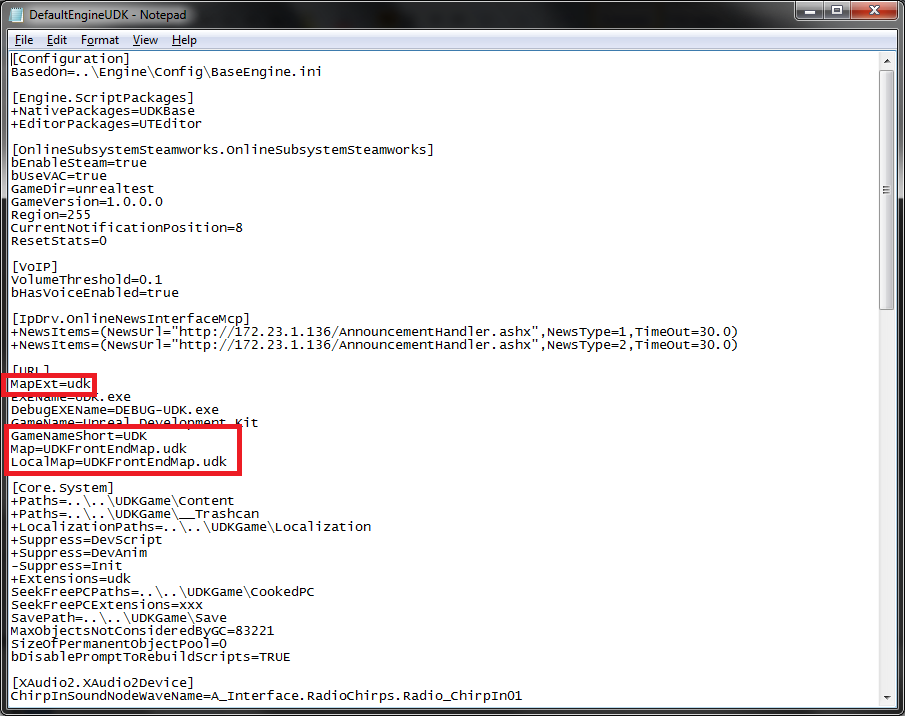
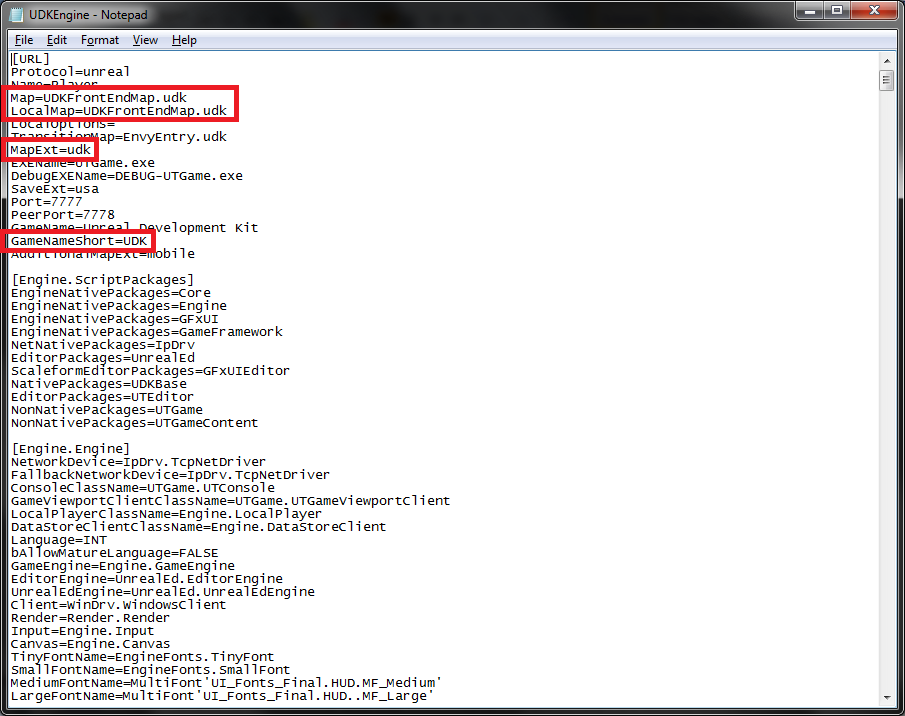
Next open "DefaultEngineUDK.ini" and "UDKEngine.ini" and change in both "MapExt=UDN", "GameNameShort=UDN", "Map=NAMEOFMAP.udk", and "LocalMap=NAMEOFMAP.udk". Save and close.
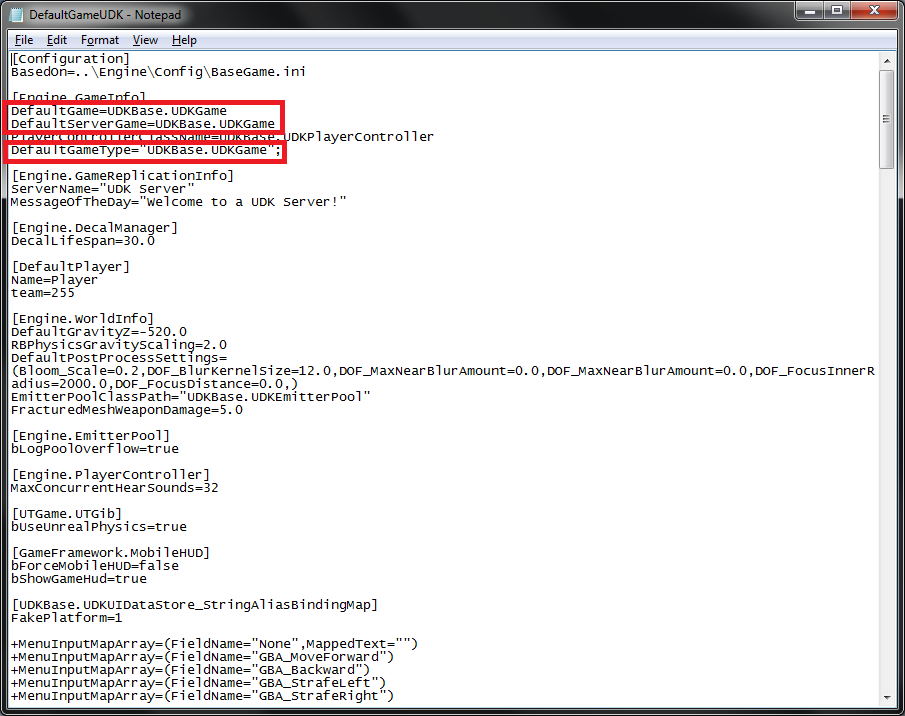
Here is the part that would be easier if you have a custom game type. Open DefaultGameUDK and change the following "DefaultGame=UDKBase.UDKGame", DefaultServerGame=UDKBase.UDKGame", and "DefaultGameType="UDKBase.UDKGame";" Save and close (Instead of "UDKBase.UDKGame" you would put your game type if you did a custom game type it would look something like "DeafultGame=MyMod.CUSTOMGAMETYPE" but if your game type is something like UTDeathmatch it would look like "DefaultGame=UTGame.UTDeathmatch" you would just have to do some digging around to find the correct url to the game type)
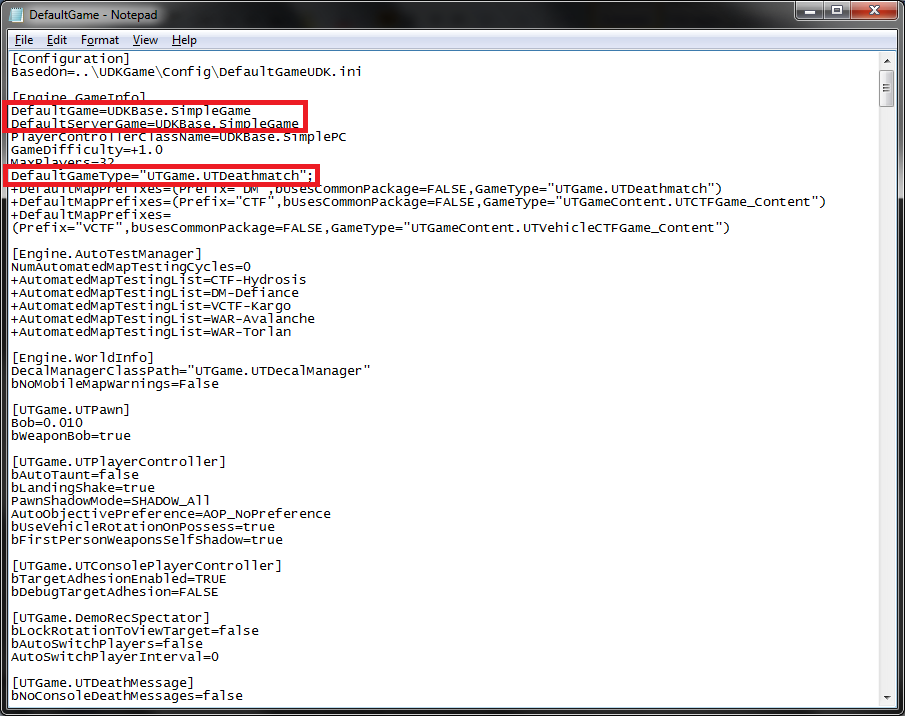
Open "DefaultGame.ini" change the following to "DefaultGame=UDKBase.UDKGame", "DefaultServerGame=UDKBase.UDKGame", and "DefaultGameType="UDKBase.UDKGame";" Now you need to add a line of code right after DefaultGameType it should look like "+DefaultMapPrefixes=(Prefix="TEST",bUsesCommonPackage=FALSE,GameType="UDKBase.UDKGame")" Just like in the previous step you can change UDKBase.UDKGame to whatever your game type is but this time you need to make sure your actual level and not your main menu has the prefix "TEST" it should look something like this "TEST-somename.udk". Save and close the file
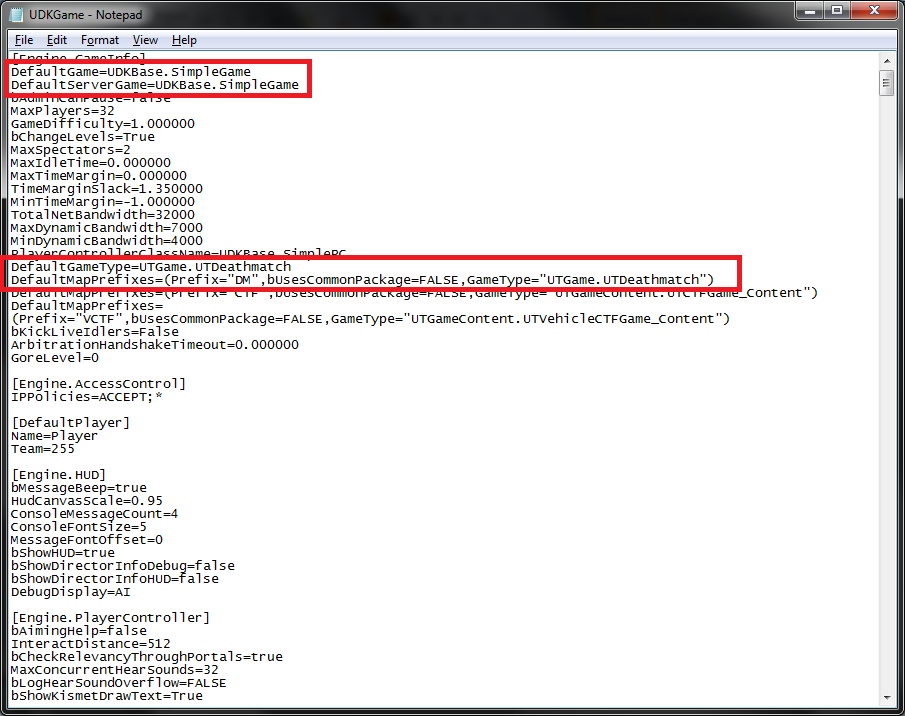
Next open to make sure your "UDKGame.ini" You need to check if "DefaultGame=UDKBase.UDKGame" is there also "DefaultServerGame=UDKBase.UDKGame", "DefaultGameType="UDKBase.UDKGame";" and that there is a "DefaultMapPrefixes=(Prefix="TEST",bUsesCommonPackage=FALSE,GameType="UDKBase.UDKGame")" Save and close this file.
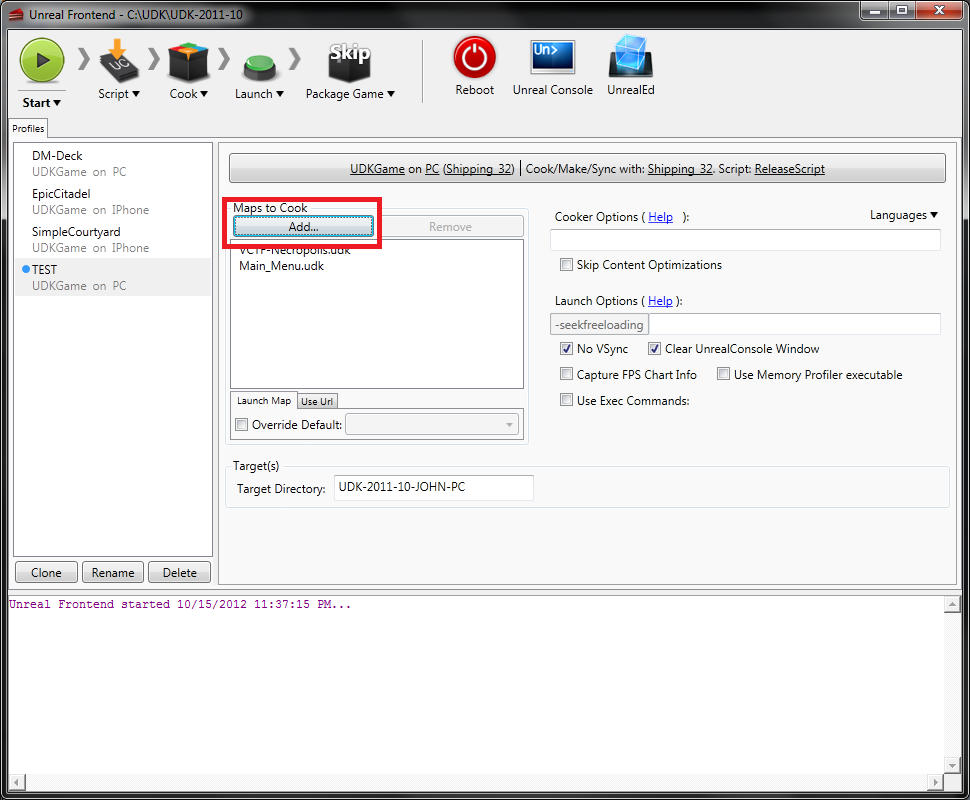
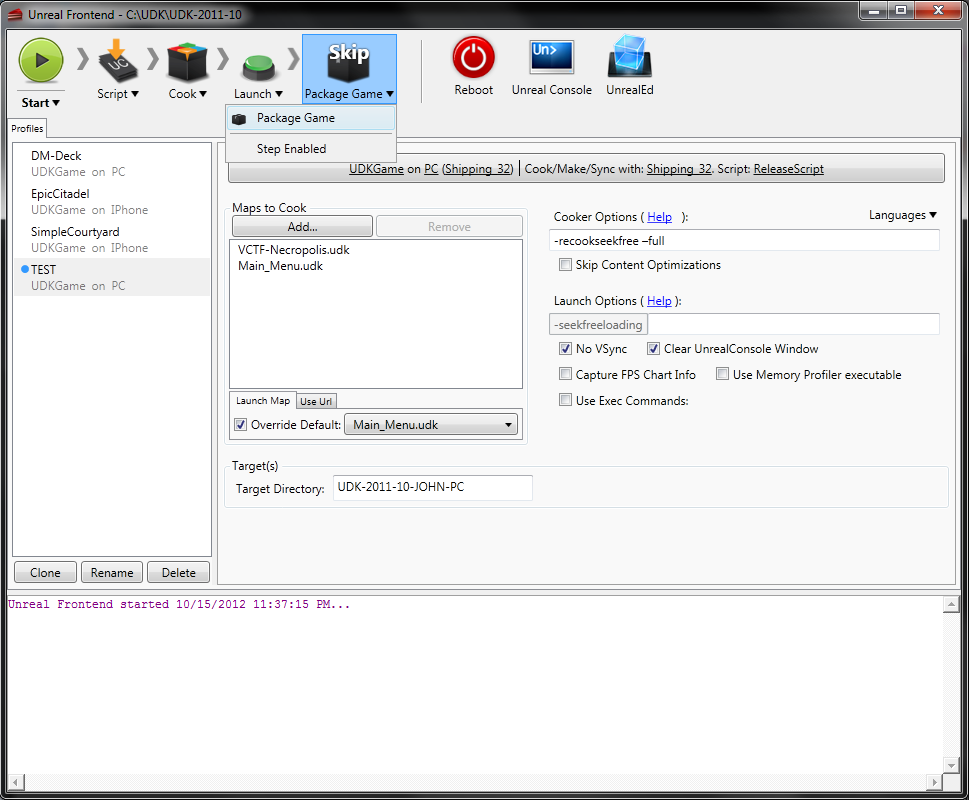
Next open Unreal Frontend Clone the DM-Deck Profile rename it to the title of the game. Next add all your maps and remove the previous map by using the Add and Remove buttons.
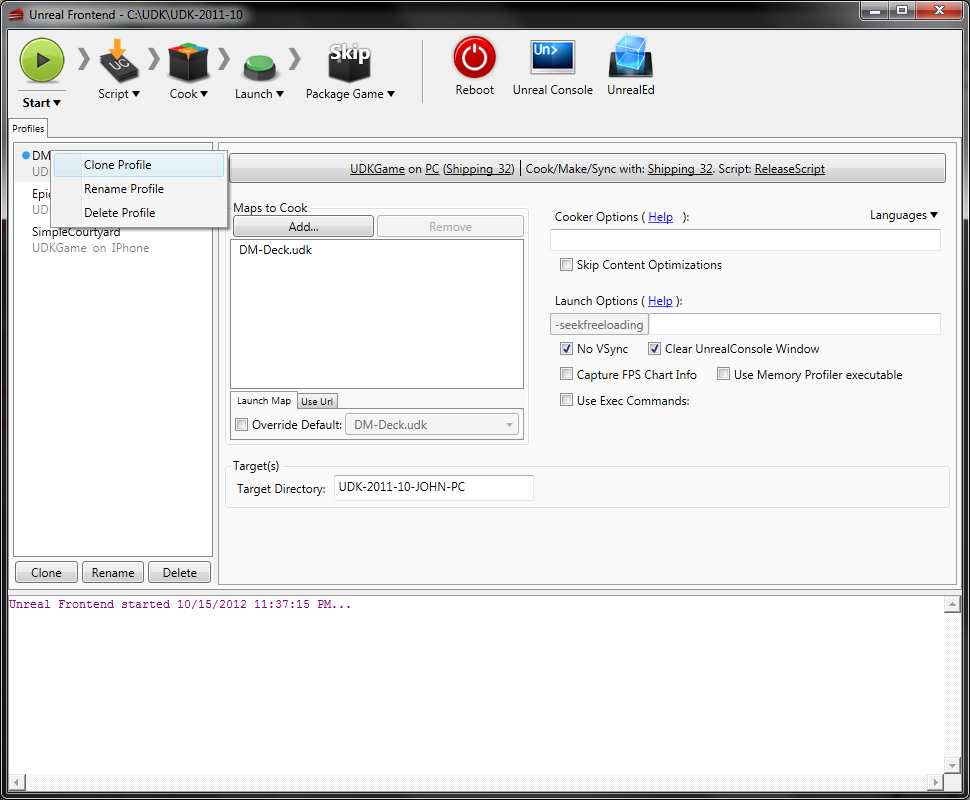
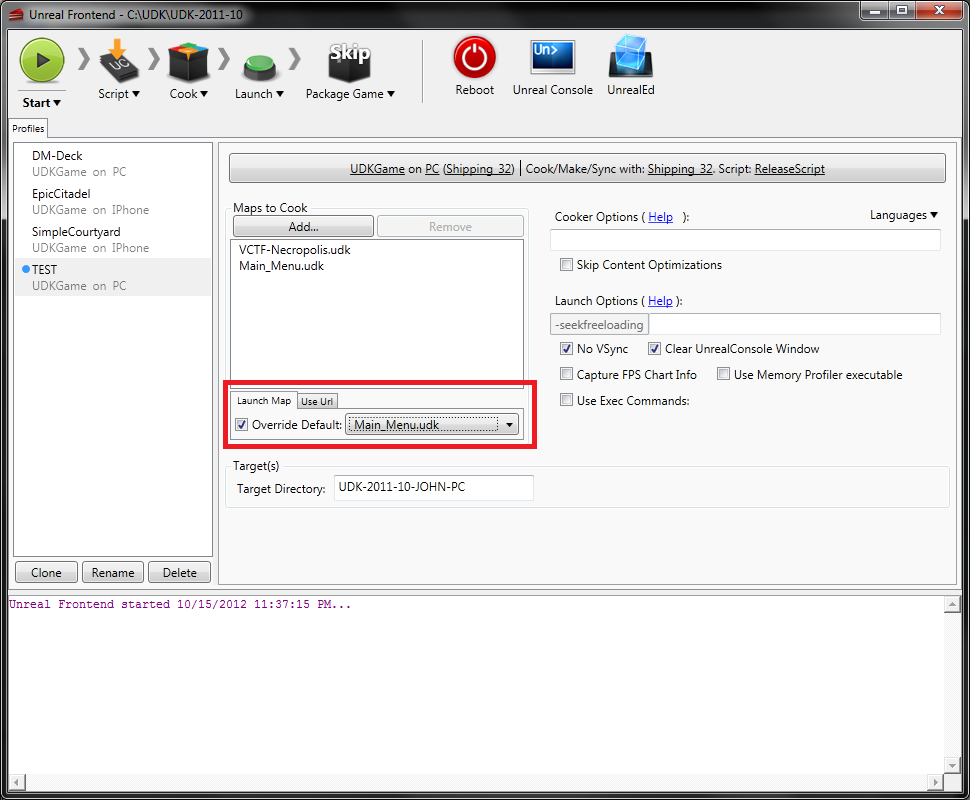
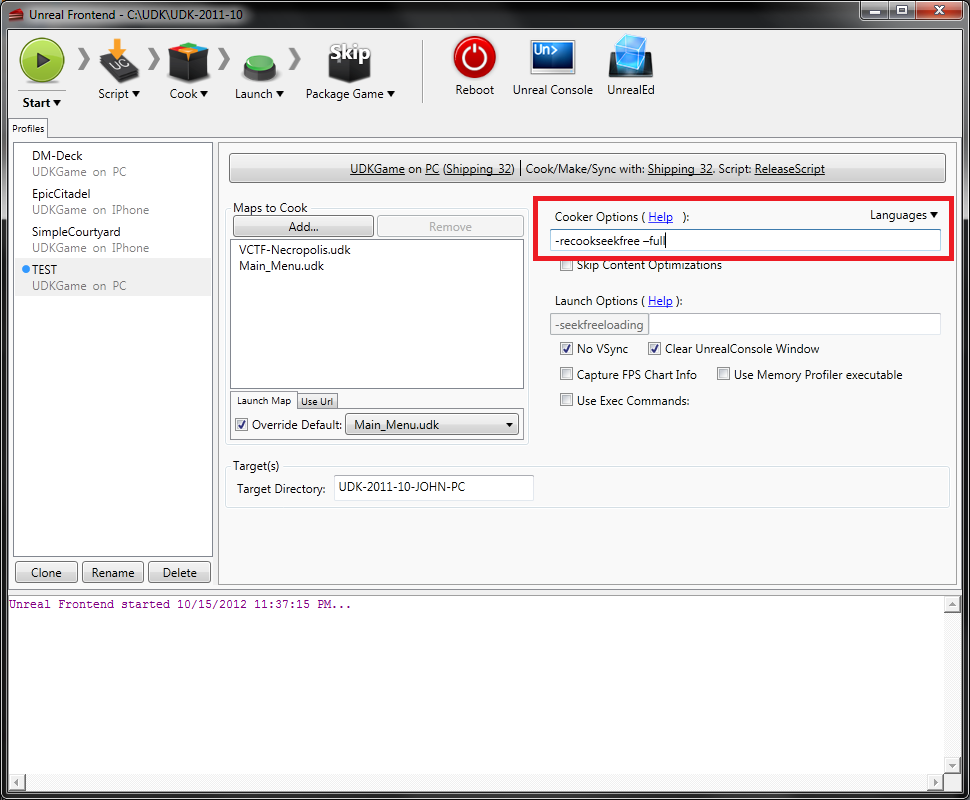
Now make your beginning map active first. This can be some by checking the box labeled "Override Default" and then select your .udk from the drop down menu. Now in the Cooker Options type "-recookseekfree -full"
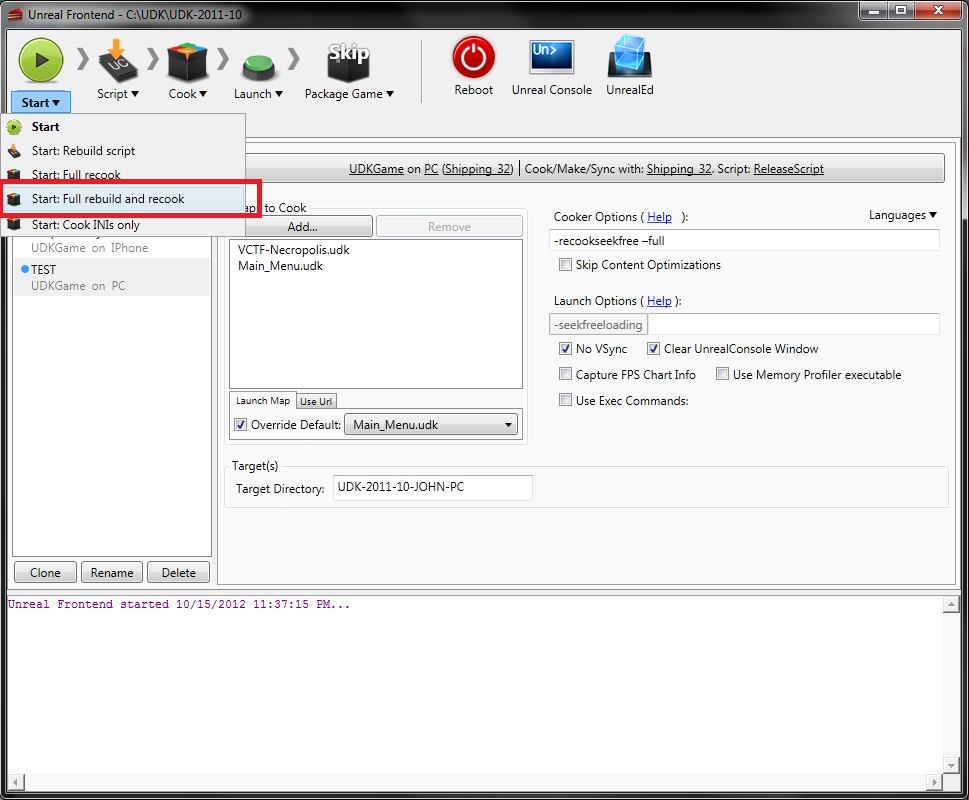
Next select the drop down arrow in Start and click "Start: Full rebuild and recook" Once it completely builds and there is no errors it will start your game. Close your game and select Package Game.
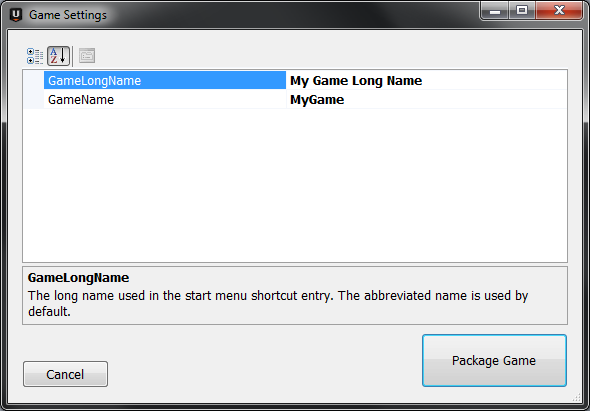
This will bring you to the final step which is saving your game as a .exe. Change the names in these fields to your game title and click "Package Game" and your done. (The location of the actual .exe file is in your "C:\UDK\UDK-2011-10\" directory to install the game you don't need UDK just administrator rights because you are installing a Game)
No comments:
Post a Comment